The Victorian Stereograph, Part 3 and Beyond
After I began collecting Victorian stereograph views in the late 1970's, I wondered how I could begin taking stereo pictures myself. I learned that in the 1950's, people had access to modern stereo cameras. An old aunt showed me some 3D slides her husband had taken of my mom when she was young. It was thrilling to see!
I wondered... could I just use my 35mm camera, take 2 pictures, paste them side by side and put them in an old stereoscope? I got my brother to pose for me by sitting very still while I took the first picture, then moved about 2" to the right and took the second picture. I couldn't wait to get those pictures developed and try out my experiment.
And it worked! There was my brother in 3D! I started getting my whole family to pose for my new hobby. I even taught my mom how to take pictures for me when she and my dad were going on a trip to Hawaii. She brought back some fantastic shots!
I began wondering if it would be easier to rig 2 cameras together and have them expose 2 images simultaneously, but the technology was more than I wanted to get into. I ordered various antique and modern 3D cameras through photography stores in New York that I found in ads in photography magazines. The main problem at that time was getting pictures developed. The 1950's cameras took photos on 35mm film, but the photo labs of the 1980's didn't quite know what to do with the strange double images they were getting with my film. I tried developing them in my own darkroom, but that was also a hassle. One camera that I liked for awhile was called the Nimslo. It was designed to take 4 simultaneous images on 35mm film. You were supposed to send it to the Nimslo lab, where they turned your pictures into lenticular pictures, which were plastic-coated ridged prints that had a weird 3D effect without a special viewer. But that wasn't the form of 3D I was looking for.


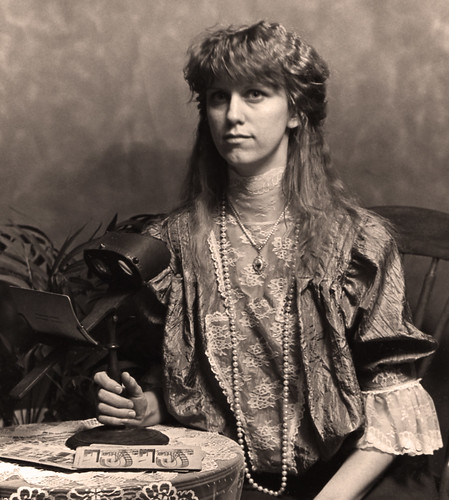
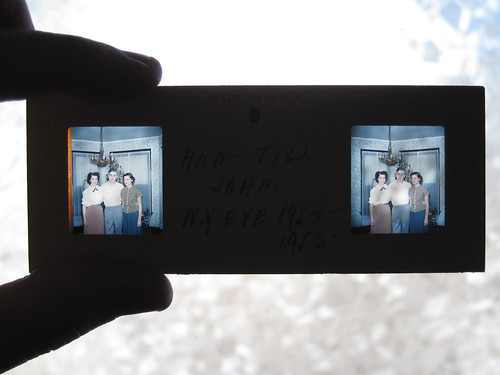
My mom and her parents in 1952!
I wondered... could I just use my 35mm camera, take 2 pictures, paste them side by side and put them in an old stereoscope? I got my brother to pose for me by sitting very still while I took the first picture, then moved about 2" to the right and took the second picture. I couldn't wait to get those pictures developed and try out my experiment.
And it worked! There was my brother in 3D! I started getting my whole family to pose for my new hobby. I even taught my mom how to take pictures for me when she and my dad were going on a trip to Hawaii. She brought back some fantastic shots!
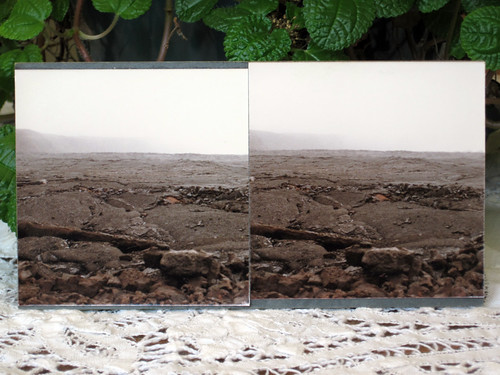
This photo of lava looks very boring as a normal picture, but in 3D, the effect is amazing!
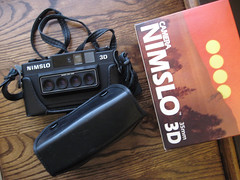
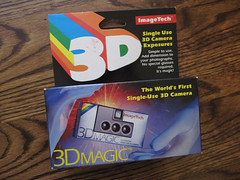
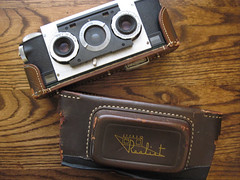
Just some of the stereo cameras I've tried over the years
Eventually, I went back to just taking 2 images one after the other, and mounting them side by side to view in my antique stereoscopes.
Do you want to begin collecting Victorian stereoscopes and stereo views? Or, as I highly recommend, take your own stereo images so YOUR life will be remembered in 3D? Here's how I suggest you begin.
Buying a Stereoscope
First, try to look through an antique stereoscope before you buy one. They don't work for all people! You can visit antique shops or flea markets and search locally, and try to view any stereo cards they have on hand. If you are amazed by the 3D effect and the price is right, purchase the viewer! They are getting harder to come by! Ebay is also a great place to find antique stereo viewers. You can search by "stereo viewer" or "stereoscope." Make sure the dealer is reputable and knows what he's selling. Sometimes, antique viewers are missing their glass lenses or sliding bars to hold the cards, making them useless.
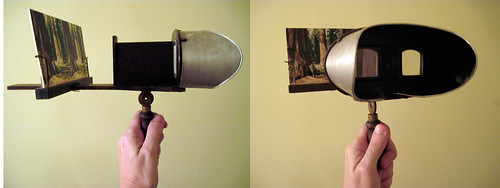
A typical hand held Holmes stereoscope
I recommend a Holmes-style stereoscope. Sometimes, you can find reproduction or modern versions of this type stereoscope. I've seen some do-it-yourself kits on eBay that look interesting and sell for about $40.00 if you can't find any antique ones. 3D Stereo.com sells 3D stereo equipment and supplies, and has a do-it-yourself pedestal stereoscope kit for $80.00.
Your Camera
You can use almost any camera you feel comfortable with. These days, I just use my inexpensive pocket digital camera for just about everything! Once you take your shots, you need to have them printed out. You can do it at home if you have a photo printer and some photo quality paper. Or you can go to Walmart or any store that has a photo processing machine and do it yourself. Or send away online to sites like Snapfish. I usually get them printed out 4x6.
How to Take Your Photographs
Decide on something to photograph. Ideally, your subject matter will include something in the foreground, middle ground, and in the distance. Stand with both feet firmly on the ground and about a foot apart. Hold your camera in the landscape position (don't take a vertical picture— you technically can, but they're harder to mount).
Aim the camera at your subject. Make sure the camera is held parallel to the ground. Before snapping the picture, make a mental note of what lies smack dab in the middle of your picture. Now snap the first picture.
Now, shift your body about 2" to the RIGHT, without moving your feet, keeping the camera the same distance from the ground and parallel to the ground. Aim the camera at your subject, placing the area that was in the center of the last picture in the center of THIS picture. Now snap the second picture.
If you are taking a photo of a person, make the person holds perfectly still while you take both pictures. When taking photographs this way, people in the background may move, a branch may blow in the wind, a cloud may blow past, or a waterfall or stream may flow. In other words, each photo may have some unavoidable differences. Don't worry! Usually when viewing, your eyes will interpret these things as movement, and will focus on the objects that are stationary. But it is best to avoid taking your pictures when there is too much background movement, or on a windy day! Here are some photos I took as stereo views. Notice how all have interesting depth, which was made even better when viewing in 3D!
Making Your Stereographs
Mounting your stereo photographs is fairly easy. You need to buy a supply of archival quality card stock, then cut it down into 4" x 7" size cards. The old stereograph cards were normally about 3.5" x 7", but since the new standard in photographic prints is 4" x 6", the 4" tall is easier to work with.
Measure the 7" width with a ruler and mark all your cards at the 3.5" mark. This will be your guideline when mounting each photo.
Make sure you know which photograph was taken for the left eye and which one for the right eye. You'll get used to noticing this over time. If you're not sure, loosely hold both images up to your viewer and see how well each works for the correct 3D illusion.
Trim the left photo to 4" tall and 3.5" wide. Mount it on the left side of the card. Now, before trimming the right photo, place your card in your viewer. Determine where to trim your right photo by putting it loosely in the viewer next to the left photo. You can probably trim the right photo in a similar manner to the left, but it's always good to test it first, because you might have tilted the camera between shots, or not lined things up properly when shooting your photos.
Once you've trimmed out your right photo, test it again in your viewer. The final mounting may be slightly tilted or up/down from the left photo, but that's OK. It might not look perfect glued to the card, but it will look perfect in 3D! (see stereo view of lava, above)
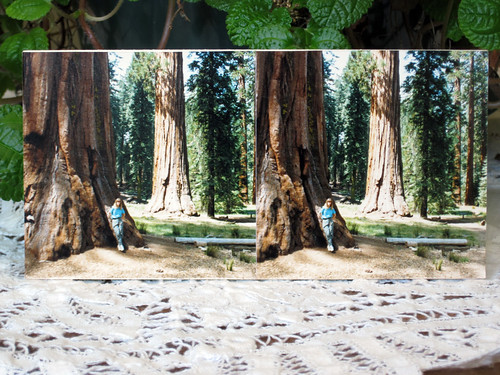
Me and some giant redwoods. The true grandeur comes alive in 3D!
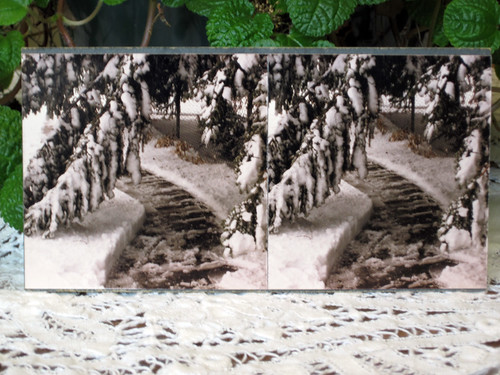
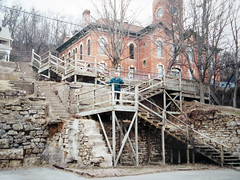
Something as simple as this shoveled walkway has 3D that makes you want to walk right into the photo!
The Result
If you've ever taken photographs of what you thought was a beautiful landscape or a great vacation shot, only to be disappointed because they looked so much better in real life that on a flat 2-dimensional picture, you will LOVE stereo photography! I know a lot of you bloggers are into scrapbooking, so you are used to working with trimmers, glue sticks and sticky tapes, and card stock. So believe me, after making a few of these, you'll get the hang of it. The stereo cards you create will NOT look like the Victorian cards did (unless you want to take the extra time to make them as such!). But they will be in full color, and will be a great way to preserve memories in a way you never dreamed possible!
Some great books in my collection may still be available:
The World of Stereographs - In my opinion, the ultimate book on stereographs
Check out these sites for some great history, photos of viewers and cards, and supplies:
A fantastic site with some great info and lots of pictures of viewers
a bit outdated and technical, but still some good tips
A lot of the better 3D online sites are outdated or out of business. I used to love a site called Rocky Mountain Memories. They sold an excellent viewer that let me mount 4 x 6 photos in an over/under viewing format. Unfortunately, I believe it is no longer available, as they are also out of business. Mounting your prints for viewing in a Holmes-style antique stereoscope is a bit trickier, but I believe most people can figure it out.
If you've read this far and want to experience some of my stereo photography WITHOUT the need for a stereoscope, visit this page. In a process called "free viewing," you will gently cross your eyes to view these images. I admit, it is tiring on the eyes, so don't do it for too long! Also note, the images are pasted in reverse order for these to work for free viewing. They will not work if placed in a stereoscope!
Labels: Entertainment, History, Photography
posted by Pam of Eastlake Victorian at
Saturday, March 13, 2010
![]()
![]()


7 Comments:
Phenomenal!!! I can't wait to try it. The Victorian Parlor is coming to visit in a couple of weeks, so guess what we'll be doing:)
You are absolutely amazing! I never would have thought to try this. Thanks so much for posting this series.
You're so welcome, Sweetbrier!
I wish you luck. I'd say the most important thing is to not move more than about 2" between each picture.
Let me know how they turn out!
-Pam
Pam,
This is amazing! Wow-you really know your stuff-thank you so much for sharing this info! I see my mother has already visited your blog so now I know what we will be working on when I go to visit her:).
Blessings,
Kim
Hi Kim-
Hope your mom has more planned for your visit than stereo photography! :)
As you can see, I'm a bit fanatical about it. I could never figure out why the interest in stereography died out after the Victorian era. Probably the movies had something to do with it. But it should be revived!
-Pam
I live near the Greenfield Village open-air museum. When they re-open in April, I plan to give your system a try.
Thanks for a fine post!
Historical Ken-
Welcome, and thank you! I wish you luck in your 3D ambitions. It really is amazing, and worth the bit of extra work to get some stereo views put together.
I really liked your sites! I will visit often. You may also like VictorianParlor.blogspot.com . They do Civil War reenactments as well.
-Pam
Thank you Pam. I am honored.
Post a Comment
Subscribe to Post Comments [Atom]
<< Home